Las actualizaciones del tutorial ahora se realizarán aquí: https://vlud.net/nac-telecodage.html
Acceso rápido: Codificación y calibración remota NAC o RCC SIN Diagbox / Adaptador CAN2010 en CAN2004 / Reemplazar un SMEG+ con un NAC en 308 ( en 208 ) / Reemplazar la cámara de 130° por la cámara de 180° en 308 / Github
--
Advertencia: Ni yo ni @bagou91 somos responsables en caso de daños a su vehículo si realiza las operaciones con conocimiento.
--

Estadísticas: número de unidades únicas

--
--
Lista de compras
- Un Arduino Uno (original o copia) + cable USB B (también disponible aquí con cable USB incluido) - entre 10 y 25€ IVA incluido - o un Arduino Nano + cable mini USB
Lista de compras opcional
- 1 tarjeta CAN-BUS Shield 2.0 (sin soldaduras
) - unos 24€ IVA incluido - o 1 tarjeta CAN-Bus Shield 1.2 ( con soldaduras /!\) (también disponible aquí ) o cualquier tarjeta con un MCP2515 y un MCP2551 /TJA1050
- Un soldador de baja potencia ( Antex 12W por ejemplo) o con temperatura regulable y un poco de estaño (el plomo es mejor, se funde más rápido) - unos 30€
Paso 0 - ¡No entiendo nada!
¿Qué es el bus CAN?
Paso 1 - Soldar los conectores al Shield
Tu tarjeta CAN-BUS Shield te llega con sus PINs para soldarte:

Te recomiendo que trabajes en una placa muy plana para evitar que los conectores queden demasiado hacia afuera o demasiado hacia adentro, es complicado arreglarlo después: suelda un PIN de cada bloque azul para asegurarte de que quede bien perpendicular a la tarjeta antes de pasar al otros, si hay un ajuste, será más sencillo.
Por eso te conviene tener una plancha de baja potencia y con una pequeña avería, debes poner un poco de lata en cada PIN, presta atención a la dirección del conector ISP, ¡debe montarse en la otra dirección!
Recordatorio:

El diagrama de cableado para el módulo de 8Mhz con Arduino Nano está aquí (es exactamente igual para un Arduino Uno)

Paso 2: Modificar el escudo
Añade aislamiento (cinta adhesiva, etc.) debajo del conector DB9 (1) para evitar el contacto de los PIN del conector con la tierra del puerto USB del Arduino (que está justo debajo).
También apague el interruptor si no está utilizando este puerto.
La resistencia de terminación de 120 Ohm (resistencia de terminación) debe estar activada en su tarjeta (P1 no cortado en v2.0 - nada que tocar -, Jumper J1 conectado - soldar o puente - en módulo de 8Mhz)
Paso 3: preparar el acceso al CAN-BUS
Para poder utilizar el programa el Arduino debe comunicarse con la caja telemática (NAC o RCC), utilizaremos la toma de diagnóstico del coche (OBD2)

En PSA el Diagnóstico CAN-BUS (Velocidad: 500 Kbps) utiliza los siguientes PIN:
PIN 3: Diagnóstico CAN-BUS alto
PIN 8: Diagnóstico CAN-BUS bajo
Según el estándar OBD2, se trata de PIN reservados a los fabricantes para su propio uso (aquí la codificación/calibración remota de gran parte de las ECU del coche)
--
Para la conexión se debe modificar un cable OBD2 a DB9 (1) (V_OBD no es necesario, GND es opcional):

O conecte directamente dos cables (idealmente multifilares) desde el bloque de terminales (4) a los PIN indicados:

Para mejorar el envío y recepción de datos (y evitar bloqueos o "estancamientos") se recomienda tener una conexión a tierra común entre el Arduino y el automóvil conectando el PIN 5 (OBD2) a cualquier punto de tierra (GND) en el arduino
Paso 4: instalar el IDE de Arduino
Obtenga e instale el IDE heredado compatible con su sistema operativo directamente desde https://www.arduino.cc/en/software#legacy-ide-18x
Paso 5: agregar las bibliotecas necesarias para el proyecto en su IDE
Descargar arduino-mcp2515.zip - Biblioteca para gestionar tarjetas CAN-BUS Shield
Descargar ArduinoThread.zip - Biblioteca para ejecución paralela de tareas ( Protothread )
Y agregue el .zip uno por uno a través de este menú:

Paso 6: compila el boceto de Arduino
Obtenga el boceto de arduino-psa-diag.ino (Versión 1.9 - 01/10/2022 )
Tienes la opción de copiar el código fuente del RAW y guardar el archivo .ino o recuperar el ZIP del maestro para recuperar directamente el .ino y los ZIP de las bibliotecas.

Paso 7: sube el programa
Conecte su Arduino mediante USB a su computadora.
Todo lo que tienes que hacer es cargar el programa en tu Arduino haciendo clic en la flecha que va hacia la derecha, asegúrate en Herramientas > Puerto de haber seleccionado el puerto correcto.

Paso 8: Depuración/Verificación
Obviamente si quieres hacer algo interesante debes conectar el Arduino vía USB a tu PC Portátil mientras este está conectado al CAN-BUS activo del coche (lo que implica tener al menos el contacto puesto)
Abra el terminal serie (en baudios 115200) y envíe " >764:664 " [↵] seguido de " 1003 " [↵]

Sorpresa, recibes un mensaje de respuesta y tu NAC ahora muestra esto:

Puede encontrar una gran lista de posibles comandos en el repositorio de Github (y descubrir qué hace el boceto detrás de los comandos que envía)
Luego puede cerrar la terminal serie para liberar el puerto COM para el programa siguiente.

[TUTO] Télécodage et calibration d'un NAC / RCC / CIROCCO / CMB_NUM SANS Diagbox via Arduino
- Démarrée par VLud
- Date de début
Vous utilisez un navigateur techniquement dépassé et avec des failles potientielles. Il se peut que notre site ansi que d'autres aient des problèmes d'affichage par sa faute.
Vous devriez le mettre à jour ou utiliser un navigateur alternatif.
Vous devriez le mettre à jour ou utiliser un navigateur alternatif.


I just tested but it doesn't works.Use the .NAC configuration file for the e-208.
Also this NAC file "208_P21E.nac" seems to be for thermal vehicles (setting 2134 is set to Thermal motor in this NAC file).
Please let me know if someone have the configuration of e-208 NAC.
Thanks
")
You can try the new config file for the e-2008 thenI just tested but it doesn't works.
Also this NAC file "208_P21E.nac" seems to be for thermal vehicles (setting 2134 is set to Thermal motor in this NAC file).
Please let me know if someone have the configuration of e-208 NAC.
Thanks
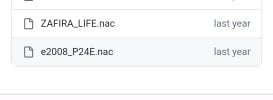
Pièces jointes
You can connect it directly at least until 2022 versions.Bonjour, quelqu'un peut-il me dire si cet appareil (9836549180-00) est adapté à une installation sur PEUGEOT RIFTER gt line. Merci pour votre aide
Make sure it has less km than your vehicle and you will have to configure it according to your vehicle's options. In my 2020 gt line
It works perfectly. I am attaching pinouts so that you can configure your buttons and the different physical button lights on the dashboard will light up.
Pièces jointes

Hola, ¿alguien puede decirme si este dispositivo (9836549180-00) es apto para instalar en la línea PEUGEOT RIFTER gt? gracias por su ayuda
Hola, muchas gracias por tu ayuda, ¿cómo configurarlo?, ¿con diagbox o Arduino?Puedes conectarlo directamente al menos hasta las versiones 2022.
Asegúrate de que tenga menos kilómetros que tu vehículo y tendrás que configurarlo según las opciones de tu vehículo. En mi línea gt 2020
Funciona perfectamente. Adjunto pines para que puedas configurar tus botones y se encenderán las diferentes luces de los botones físicos en el tablero.
Arduino.Hola, muchas gracias, ¿cómo configurarlo?, ¿con diagbox o Arduino?
Si consigues hacer una buena adaptación entre la carcasa del cuadro y el nuevo panel házmelo saber.
Arduino.
Si consigues hacer una buena adaptación entre la carcasa del cuadro y el nuevo panel házmelo saber.
ok je te tiendrai au courantArduino.
Si consigues hacer una buena adaptación entre la carcasa del cuadro y el nuevo panel házmelo saber.
You can connect it directly at least until 2022 versions.
Make sure it has less km than your vehicle and you will have to configure it according to your vehicle's options. In my 2020 gt line
It works perfectly. I am attaching pinouts so that you can configure your buttons and the different physical button lights on the dashboard will light up.
I just tried with the new e-2008 NAC config file:You can try the new config file for the e-2008 then
- I confirm that this one is indeed adapted for electric vehicles
- On the config file, the "On-Board computer display" setting is disabled, which is hiding the "On-board computer" application.
- I tried to re-enable this setting manually, but the "On-board computer" is still displaying L / 100 Km.
I concluded that the On-board computer application is probably not compatible with displaying electric consumption.
Please let me know if someone managed to get it worked.
Thanks for your assistance anyway !
Hi, sorry for digging out so old post, but I have problems with TPMS.Hello!
I activated both functions from VLud`s app, no console needed, For the speed adjustment, It is in zone 211B, one or more of the settings from the 8th row downwards, I don`t remember exactly which one, "Memorized speeds" and/or "Selected speeds" or "Speed adjustments", fiddle with it a bit and which one it is, I can`t remember exactly atm xD. As for the TPMS, it`s a result of the "Diagnistics" menu which you activate by ticking "Check" in 2126 zone (but watch out, I had a headache trying to make it work, there is another "Check" function in 210B, only one of them has to be checked in order to work, but I don`t remember which one, try with both of them and see which one, otherwise you`ll have a grayed out useless check touch button in your NAC...) and "Tire pressure" in 2125, and in 2100 "Tyres Pressure"
First of all - I changed polychrome display to color one in my 2017 508. It was taken from 208 and it lacked some of screens that I needed. Using DB 7.44 (or something like that - older one) I added start-stop functionality and modify car icon to look more like 508 SW
But I still have one thing missing - in old display when I press "check" i got a lot of communicates, including data from TPMS. In new one it's missing. Than I tried using arduino, etc. I tried almost everything to make TPMS at lest to be on the main screen, but nothing worked for me.I don't have "Tyres Pressure" in 2100, but checked "Tire pressure" in 2125 and try with both "Check" (only in 2126, only in 210B and even in both zones) - I'm still getting gray "Diagnostics" in "Drive" menu.
So my questions are:
- can I bring back TPMS on my speedometer sceen using arduino? If yes- how? I was trying to find this on forum, but only thing was this post that I'm citing
- how to make "Diagnostics" menu work?
Thanks and best regards!
Dernière édition:
Hello dear friend,Ok here solution for you
that's for RCC when someone activated all Ambience themes in 2127 then will select 4-5-6 theme in dropdown menu on touch screen and reboot unit , unit wil stuck on Ambience not configured....
tested on my RCC wave2 with same failure..
take 5-7min to repair (many hour to get proper step)
Restore parameters with attached files (this files are from Vorvolk config)
1 send will remove peugeot logo on start
2 when you will see normal menu (jump to 4,5) when still no menu send 3
3 when you see menu send
4 restore Peugeot start logo
5 restore 3 themes
take coffe and happy driving
restore
I have the same problem in my unit but can't do what you did
I can't understand your steps
Could you help me please with clear steps
Sorry if I write in English as my French is too weak
Thanks
Boa tarde, de Portugal, peço desculpa mas preciso muito da vossa ajuda.
Tenho uma 5008 II 1.6BHdi Allure, com todos os sensores câmera e avisadores de mudança de faixa queria activar o parkassist e já agora desbloquear os temas do meu Nac wave 2.
Digam-me como adquirir o software e hardware Arduino e quais os passos a fazer para conseguir. Desde já agradeço a vossa atenção.
Hello @marcins , it seems that you know well how to use Arduino to code ECUs...you have easy step and numered files to send ,, can't explain more easy ,
if you really don't understand don't play with the car
Could you help me about this issue ?
[MATT_C_2010] Enable hidden pages using Arduino on 308 T9 Ph1
Bonjour à tous, J'ai essayé via Arduino, d'ajouter les pages "cachées" dans la matrice couleur de ma 308 T9 Ph1 Féline. L'ECU est le MATT et la clé, ECEC, la zone à coder est la 2100 et les valeurs pour avoir toutes les pages, semble-t-il, 8CF600050000AEA0. I tried via Arduino to add the...
Thanks

Everything is on the tutorial. Read the tutorial. It describes step by step...Boa tarde, de Portugal, peço desculpa mas preciso muito da vossa ajuda.
Tenho uma 5008 II 1.6BHdi Allure, com todos os sensores câmera e avisadores de mudança de faixa queria activar o parkassist e já agora desbloquear os temas do meu Nac wave 2.
Digam-me como adquirir o software e hardware Arduino e quais os passos a fazer para conseguir. Desde já agradeço a vossa atenção.
Consegue por favor deixar aqui ligação direta ao tutorial? Sou iniciante nisto e estou um pouco atrapalhado, aqui em Portugal pedem valores exorbitantes porque há pouca gente a fazer isto. Eu só quero saber para fazer para mim não é para negócio. ObrigadoTudo está no tutorial. Leia o tutorial. Ele descreve passo a passo...
How do i "code" electric driver seat welcome" option? I´ve seen this code 652 752 2E:234C:04:01 but don´t know how to code it with the arduino. Anny hints are welcome.
Envoie moi le flash svp vludBetter don't do it, I'm electronic hobbyist only, took me an hour to restore the software


dump on your 3008 pleaseBuy a new more recent cluster (from Hybrid car) or flash Hybrid NAND dump on your 3008 CIROCCO.
No other solution, no need to tell the same thing over & over, it won't fix your issue.
Tenho um Nac wave 2 numa Peugeot 5008, consigo desbloquear os temas?
Quais os parâmetros a alterar para activar o parkassist? Obrigado.
Quais os parâmetros a alterar para activar o parkassist? Obrigado.
Study the tutorial and study this thread. There are 168 pages to study. And it's better to type in English or French. Good luck with your projectTenho um Nac wave 2 numa Peugeot 5008, consigo desbloquear os temas?
Quais os parâmetros a alterar para activar o parkassist? Obrigado.
What type of actualization you did?J'ai un problème avec la Peugeot 3008 Scirocco. Je l'ai mis à jour pendant la mise à jour. Je l'ai arrêté et cela n'a pas fonctionné. Un écran noir est resté.
Discussions similaires
- Réponses
- 42
- Affichages
- 10K
- Réponses
- 534
- Affichages
- 112K
- Réponses
- 308
- Affichages
- 152K